 The one thing that all crafters and artists need is portable, convenient
STORAGE...whether it be an actual port folio, a painters case /
easel or even a LARGE BAG to put multiple craft items all in one place.
My inspiration for this project came from a gift that my mom-in-law Barb, gave to her sister Brenda.
Brenda, who is also an artist, is currently helping to inspire children to have lots of fun with crafts in a local after-school program...her new denim bag is just the right size to throw in brushed, craft paints, stickers, colouring books, stamps, and whatever else you can think of.
Well this post is about a denim purse...but not just any denim purse, one made from a pair of jeans!
What a great way to recycle :)
I will show you how to create your own with images.
Obviously, the two images above are of the basic construction.
The purse that my mother-in-law bought was basically a pair of jeans sewn at the crotch area, leaving the waist and sides of the jeans intact.
My version of this purse uses some of the jean fabric from the legs to create thicker sides...so I can put multiple binders inside.
The two images above show the front, back and side strips cut in preparation for sewing.
Above, you see that the outer shell is almost finished...I now have to create the bottom.
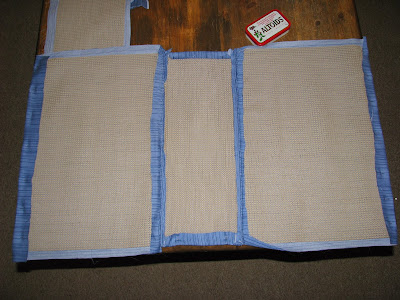
NOTE: You can see some beige fabric to the right, that is actually non slip matting for under a carpet. I will use this a little later on...because I like that it is more firm that just fabric, but is still very flexible.
In the image above, you can see some denim material (I know it isn't the same type of denim as the outside, but it won't matter)...what you don't see, is the faux leather I have on the other side.
Remember, when you are sewing, you are doing everything inside out...when I turn this purse shell right side out, you will see that it has a ginger brown faux leather bottom, and a denim bottom on the inside.
I wanted to double layer the bottom for stability.
SEE! Isn't that nice?
The outer shell is pretty much finished...now I'll work on the inner lining.
This is where I use the non slip matting.
Measure the dimensions of the inside of your purse so you can cut your fabric for the lining.
Make sure to leave at least a half inch of excess for your stitch lines.
The next 4 images depict the construction of the lining.
Now that the pieces have all been cut, let's pin the sides together.
Sew all seams, but, leave the top opening just pinned...we will sew it to the inside of the purse.
Now, I created the strap using fabric from the legs of the jeans...
The next 2 images show that I am attaching the strap ends to the purse sides.
I added a slight pleat to the sides of the purse on either side of the strap for strength.
In the image below, the edge of the liner has been pinned and is about to be sewn in place...
almost finished!
Here is the purse finished!!!!!
I can hold up to 4 full binders in it as well as some files.
YIPPEE!!! SUCCESS!!!!
I hope you enjoyed this post.
Until next time Be Creative...:)


